Best Tools for Editing Raw Travel Footage in 2026: A Comparison
You have 200 GB of raw footage and no video yet. In that state, fewer tools apply than you'd think — most of what shows up in "best AI video editor" roundups assumes you've already picked your clips, or already have a finished video.
So this compares them on two axes: what each one needs as input, and how far it takes you.
Axis 1 — What each tool needs as input
Tools that need a finished video. OpusClip, Submagic, Vizard. You give them one long completed video and they cut it into shorts. Excellent at that job. Useless on raw footage, because there's no finished video to slice.
Tools that need you to do the editing. Premiere Pro, DaVinci Resolve, Final Cut. Full control, full manual work. The AI features assist with individual tasks like color matching or transcript-based trimming. They don't decide which of your 380 clips to use.
Tools that need a rough selection. CapCut sits here. Strong auto-captions, templates, social-first export. It will speed up your edit significantly once you've picked your clips. It won't pick them for you.
Tools that work from raw footage. Camera manufacturer apps and heimlog. Which is where the second axis becomes necessary.
Axis 2 — How far each one takes you
Starting from raw footage doesn't mean the same thing across tools. GoPro Quik takes raw footage and hands back a 30-second reel. heimlog takes raw footage and hands back a 10-minute vlog with captions and music already on it. Same column, different object.
Finishing a vlog means passing through all of these stages.
| Stage | CapCut | Premiere / DaVinci | GoPro Quik / Insta360 | heimlog |
|---|---|---|---|---|
| Choosing usable clips | Manual | Manual | Auto | Auto |
| Scene classification (food, hotel, etc.) | — | — | — | Auto |
| Sequencing | Manual | Manual | Auto (to the beat) | Auto (chronological or themed) |
| Speech captions | Auto | Auto | — | Auto |
| Caption styling | Templates | Manual | — | Templates |
| Music | Manual pick | Manual pick | Auto | Auto |
| Blurring bystanders' faces | Manual | Manual | — | Auto |
| What you get | Whatever you assemble | Anything | 30s–2min reel | 8–12min vlog |
CapCut is strong from captions down and empty above. Camera apps handle the top and skip the bottom, and what they output is a reel. Nothing has covered both halves in one pass.
Why action cam footage breaks most of these
If you shoot with a GoPro or Insta360, your problem is volume before it's anything else. The camera runs while you're not thinking about it, which is the point, and six hours of footage for a ten-minute output is normal.
The volume is only half of it. Six hours you can't navigate is worse than six hours you can. Filenames like GX010147 tell you nothing. Wide-angle thumbnails are all sky or pavement, so forty files look identical in a grid. GoPro chapters long recordings across separate files, so a single moment often lands on a boundary. And if you shot 4K or HEVC, scrubbing stutters before you've made a cut.
CapCut is genuinely good at what it does, but you still have to know which clips to bring in. Premiere gives you everything, and you still have to watch six hours to know what you have. The selection step is the wall.
What about GoPro Quik and Insta360's auto-editing?
They belong in this comparison, and most roundups leave them out.
GoPro Quik auto-uploads footage to the cloud while the camera charges, then generates a highlight video and sends it to you — best shots selected, cuts synced to the music, transitions added. There's a macOS desktop version too.
Insta360's AI Highlights Assistant flags standout moments during recording, so a ready-edited reel is waiting in the app's Memories when you connect your phone. Insta360 states this processing runs on the camera or phone and that raw footage and face data aren't uploaded. Supported on X5, X4 and the Ace series, with some shooting modes excluded.
Both work. Both produce short highlight reels — 30 seconds to two minutes, beat-synced, made to post.
A travel vlog is a different object. It runs eight to twelve minutes, moves chronologically, includes the parts where you talk to camera with captions on them, and draws on multiple days and multiple cameras. Highlight reels carry no captions and don't handle speech at all. That was never what they were for.
Two more limits matter if your footage has been sitting a while. These reels are generated at or near capture time, so a folder that's been on an external drive for a year was never flagged and no reel is coming for it. And both are tied to their own hardware, so phone footage from the same trip stays outside.
What heimlog does
Point it at the folder. From there:
It selects highlights automatically. Scenes are scored against six criteria to shortlist usable segments, and near-duplicate shots are filtered out.
It classifies scenes. Food, accommodation, shopping, sightseeing, transit. Which is why you can choose at the start between running the whole trip chronologically or pulling one theme into a single video.
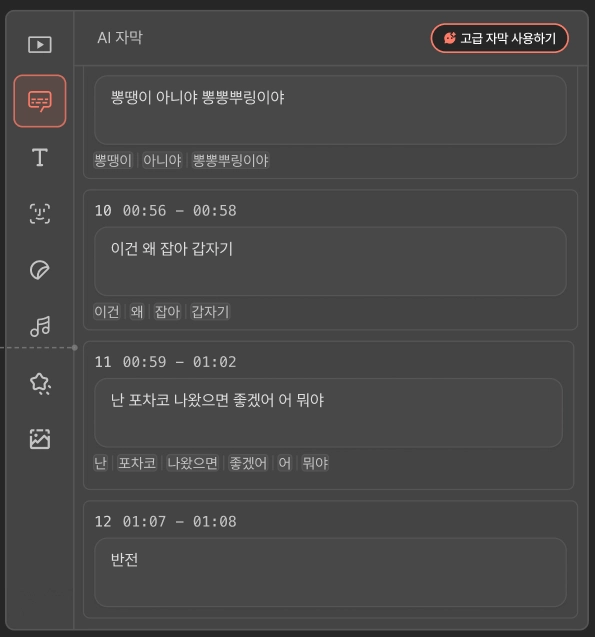
It turns what you said into captions. STT isolates speech, generates the captions, and applies a style template. This is where most of the manual hours in a vlog go, and it's the part camera apps don't touch at all.
It adds music automatically, matched to the mood of the scene.
It blurs bystanders' faces automatically. The thing that stops you publishing travel footage, and the thing that means masking and tracking every affected cut if you do it by hand.
All of that is automatic. What comes back is a set of scene cards, and any cut you don't like gets swapped right there.
The AI proposes; you decide. Each card carries the reasoning behind that cut. Fully automatic editing produces videos nobody feels ownership of — a well-documented failure mode in this category.
No editing experience required. You don't need to know how to work a timeline, sync captions, source music, or track a blur. What you get is a video that's essentially finished; the only decision left is whether to refine it.
→ See a real result: 5 hours of raw footage → a 9-minute vlog
Practical recommendation
If you already have a finished video and want shorts: OpusClip or CapCut.
If you want full creative control and have time: Premiere or DaVinci.
If a 30-second reel is all you need from a single shoot: your camera's own app is the fastest route.
If you have raw footage and no video yet, which is where most travel and action cam creators actually are: you need selection through captions, music and blur in one pass. That's the gap heimlog fills.
Then take the output into CapCut or Premiere if you want to refine it. These aren't competing choices — they're sequential steps, and most people are stuck at the first one.
heimlog is in closed beta. Sign up and you get 70 credits to build your first vlog.
→ Join the beta
FAQ
What's the best editor for raw GoPro footage?
Depends what you're making. For a short highlight reel, GoPro's own Quik app is fastest. For a captioned long-form vlog, you need something that handles structure and captions from raw clips before you open an editor at all — most editors assume selection is already done.
Can I make a vlog with no editing experience?
You don't need to have worked a timeline before. Clip selection, sequencing, caption generation and styling, music, and face blur run automatically; your job is swapping the cuts you don't like.
How do I handle strangers' faces in travel footage?
heimlog blurs bystanders' faces automatically. Done by hand, this means masking and tracking every affected cut.
Can GoPro Quik make a full travel vlog?
Quik produces short, music-synced highlight videos. It doesn't generate captions, and it isn't built to assemble an 8–12 minute long-form vlog in chronological order.
Can CapCut edit raw footage directly?
CapCut is strong once your clips are selected. Its captions and templates are excellent, but it won't choose which of several hundred raw clips to use.
Why is my GoPro recording split into multiple files?
GoPro saves long recordings in chapters across separate files, so a single moment often lands on a file boundary. It's one reason raw folders are hard to navigate by filename.
References
- GoPro, Quik auto highlight videos — gopro.com
- Insta360, AI Highlights Assistant manual — onlinemanual.insta360.com
- GoPro, chaptered recording and file naming — community.gopro.com
- Adobe, Scene Edit Detection user guide — helpx.adobe.com
After a few vlogs shot on your phone, most people arrive at the same place. Filming has started to feel natural, but the result is somehow different from the videos you watch — and it's hard to say exactly what's missing.
The first thing that comes to mind is a camera. And often a camera really is the answer. But which camera is the answer isn't something you learn by filming more. You learn it by editing.
Here's the order, from free to $1,000.
Can you make good vlogs with just a phone?
Yes, and for longer than you'd expect. A recent iPhone or Galaxy shoots 4K, handles daylight well, and stabilizes handheld shots fine when you're standing still. Plenty of travel vloggers in the tens of thousands of subscribers shoot on nothing else.
Four things genuinely limit it:
- Audio. The mic sits a meter from your mouth and picks up everything between. Play back something you filmed on a street and you'll hear it immediately.
- Walking shots. Digital stabilization crops into the frame to compensate, and it still can't smooth out the rhythm of a stride.
- Low light. Restaurants at night, night markets, the hour after sunset. The prettiest moments of a travel vlog happen to live right there.
- Heat and battery. Long 4K takes throttle, and you're navigating with the same device.
If you can't immediately tell which of the four is your problem, that's normal. We'll come back to it.
What to fix before you spend anything
All free, and each one changes more than a gear upgrade would.
Shoot short, many times — not one long take.
A five-minute walking clip gives you one usable shot. The same walk filmed as ten separate 10-second clips gives you ten. Vlogs feel polished because of cutting rhythm, and you need at least two shots before you can cut anything.
Hold each shot 8–10 seconds.
Most people lower the phone at about three. Once you trim the ends, there's nothing left to work with.
Film the boring stuff.
Opening the hotel door, the train pulling in, hands on a menu, a suitcase rolling. These are exactly the shots that let one scene flow into the next, and they're the ones almost nobody brings home. They're also what you'll miss most while editing.
Move the mic closer.
Bend your elbow instead of extending fully, and turn out of the wind before you speak. Those two habits fix about half of your audio problems.
Lock your settings.
Pick 30 or 60 fps and leave it. Mixed frame rates only create work later.
The microphone is the exception
There's exactly one purchase worth making before you edit anything: a mic.
Audio problems can't be rescued in the edit. However well you choose your cuts, a sentence buried under wind stays buried. And viewers will forgive a shot that's dark or shaky, but they leave when they have to strain to hear. That's closer to a reflex than a preference.
The DJI Mic Mini ($89) or Rode Wireless Micro is plenty. Small enough to clip on and forget, connects straight to a phone. If your budget is $100 total, this is where it goes.
Everything after that, one finished edit will tell you
This is the part worth reading twice.
No amount of gear reading answers the actual question: what do I need? Reviews tell you what a camera is good at. They can't tell you what you're failing to capture.
That only surfaces when you take your own footage and finish one video with it. Editing is fundamentally the act of sorting usable from unusable — and the reasons your unusable clips were unusable are your shopping list.
| If this happened while editing | What you're missing |
|---|---|
| Scenes cut abruptly, nothing to bridge them | Not gear — filming habits (connective shots) |
| You discarded several clips where you were talking | A microphone |
| Nearly every walking shot got thrown out | A gimbal camera (Osmo Pocket) |
| Evening and indoor shots are the only unusable ones | A larger sensor |
| Lots of "I should have been filming that" gaps | An action cam (hands-free capture) |
| Everything is technically fine but the image looks flat | A mirrorless body and a fast lens |
That last row matters. Sometimes mirrorless genuinely is the answer. Shallow depth of field, the way a subject separates from the background, the color rendering — a phone or a gimbal camera can't produce it, and if that's what's making your vlogs feel flat, a Sony ZV-E10 II or Fujifilm X-S20 is the correct purchase.
The point is to make that call after editing. If you finish a video and still think "the image itself is the problem," buy with confidence. If it turns out the problem was connective shots or audio, you just saved a thousand dollars.
Not sure which row is yours? Making one video from your last trip is the fastest way to find out. You can do it free on heimlog →
Reference: what to buy, by symptom
Walking shots were the problem — the DJI Osmo Pocket 3 ($439). A mechanical gimbal means you stop thinking about stabilization entirely, and the 1-inch sensor holds up in the evening light your phone struggled with. The Osmo Pocket 4 ($549) is out, but the 3 is still the value pick.
Missed moments were the problem — the GoPro Hero 13 Black ($399) still leads on stabilization under vibration, and the DJI Osmo Action 6 ($329) has the larger sensor, better low light, and roughly four hours of battery.
You don't want to think about framing — the Insta360 X5 ($550) captures everything around you and lets you choose the angle afterward. The selfie stick disappears from the shot.
The image itself was the problem — the Sony ZV-E10 II or Fujifilm X-S20 (around $900–1,000 body only). Lens decisions and weight come with it, but so does something the other categories can't substitute.
| Phone | Osmo Pocket 3 | Action cam | Insta360 X5 | Mirrorless | |
|---|---|---|---|---|---|
| Walking shots | Usable | Best | Good | Good | Needs a gimbal |
| Low light | Weak | Good | Fair | Weak | Best |
| Background blur | Portrait-mode imitation | Weak | None | None | Best |
| Carrying it | Easiest | Easy | Easy | Easy | A commitment |
| Editing time | Unchanged | Slightly more | Much more | Most | Slightly more |
| Cost | $0 | $439 | $329–399 | $550 | $900+ |
But better gear makes editing harder
That "editing time" row isn't filler.
Buy a camera and your footage volume jumps. That's not a side effect — it's the design goal. A gimbal camera in your pocket comes out for shots you'd have skipped with a phone, and an action cam is built entirely around mounting it and forgetting it. Both work exactly as intended.
The bill arrives when you get home.
Phone footage was a folder you could scroll through in one sitting. A weekend with a Pocket 3 and an action cam produces hundreds of clips for a single ten-minute video — near-identical to each other, all named something like DJI_0341.
This is where most people stop vlogging. The filming stays fun. What ends it is the evening spent scrubbing through hundreds of similar frames trying to recall which take was the good one. Put it off once and the folder sits untouched until the next trip.
Which is why the order matters. If you upgrade your gear before you've ever finished an edit, you'll edit even less than you already do.
How long does editing a vlog actually take?
The common industry benchmark is 30–60 minutes of editing per finished minute. For a 10-minute vlog, that's 5–10 hours.
And much of that isn't editing at all. It's watching your own footage end to end to find out what you have.
Assembling a cut takes about the same time whether you started with 40 clips or 400. Deciding which of the 400 to use does not.
Tools like CapCut and Vrew help with the second half. They generate captions, strip silences, apply templates — genuinely good tools that genuinely save time. What they have in common is that they start helping after you've decided which clips to use. Their territory begins the moment you open the timeline.
The problem is that a lot of people are exhausted before they get there.
What heimlog handles
heimlog is a tool that takes the multiple video files you shot on a trip, uploaded all at once, and uses AI to select the usable scenes and arrange them into a vlog draft — either chronologically or by theme. Once the draft exists, you adjust the cut order, captions, and music yourself.
How it works:
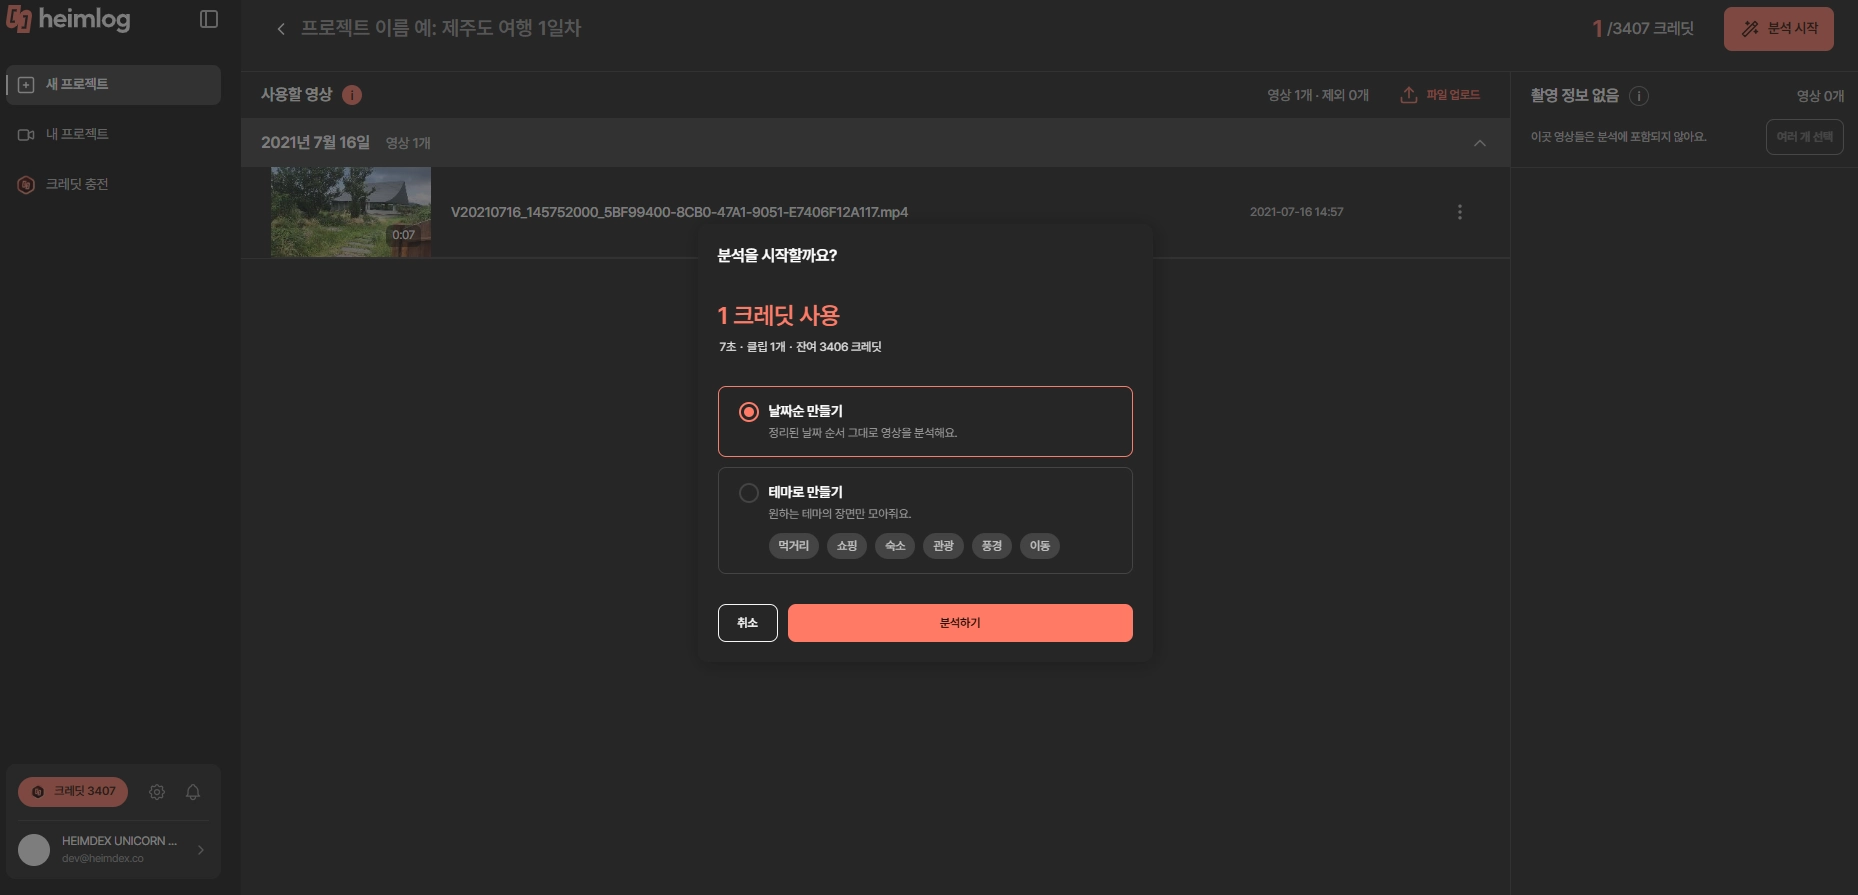
- Upload the folder as-is. No sorting or renaming required
- Choose chronological (the trip in order) or one theme (food, accommodation, shopping, travel days)
- When analysis finishes you get scene cards. Each shows why that clip was picked, so you can pull anything you disagree with
- Drag in shots from the unused clips, fix captions, export
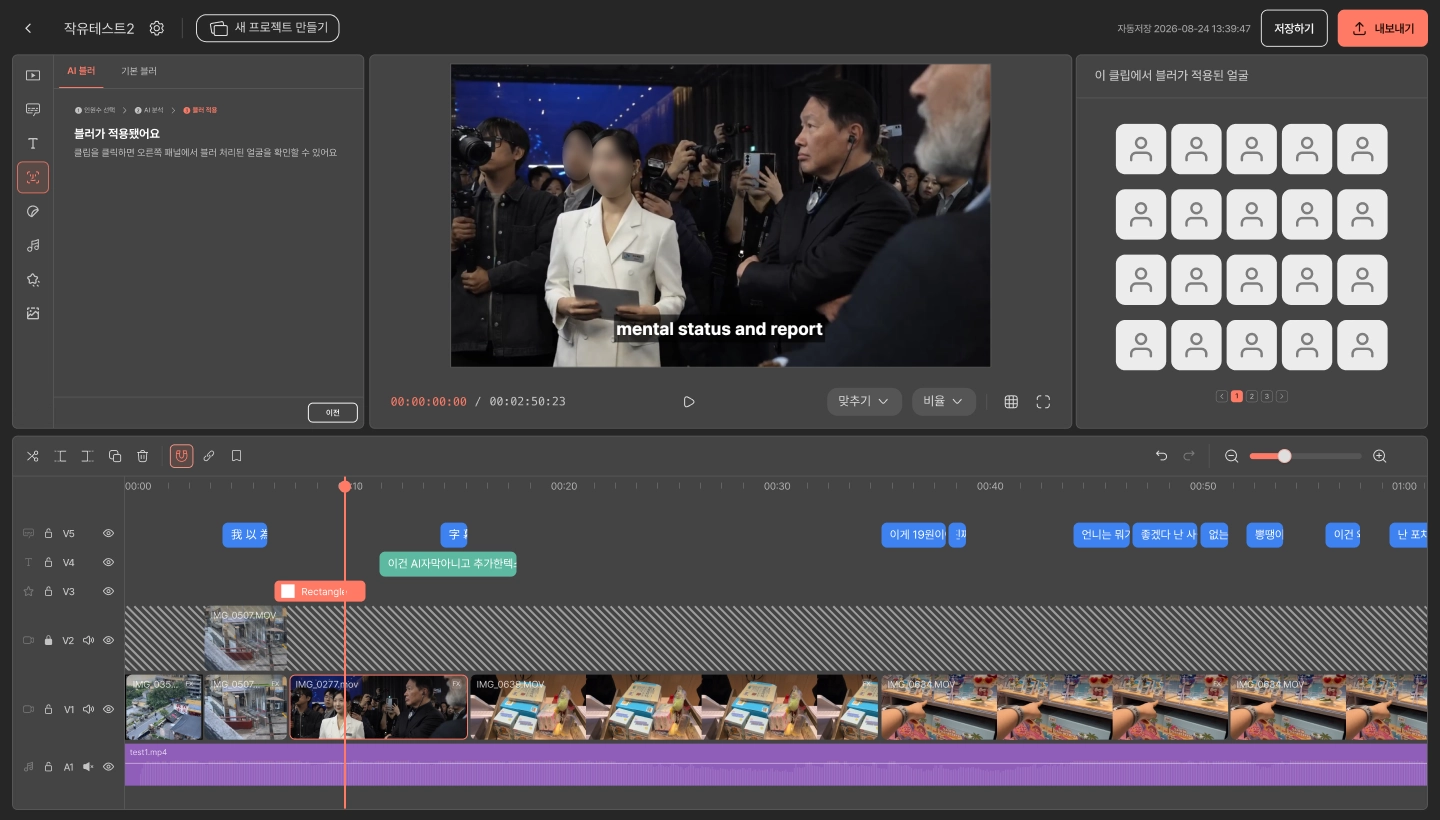
The specs:
- Upload limit: up to 200 minutes of total video (max 5 GB per file)
- Formats: MP4, MOV, HEVC
- Analysis: up to 30 minutes, with an email when it's done
- Export ratios: 16:9, 9:16, 1:1
- Speech-recognition captions, built-in BGM library
- Videos made on a free account carry a watermark
What it can't do, plainly: frame-level color matching and multi-track audio mixing. If you need those, Premiere or DaVinci is the right answer. heimlog replaces the step where you decide which of several hundred clips are worth using.
That's also what makes it useful for the gear question above. Once the draft exists, you can see which clips were selected and which were left out in one view. If the walking shots are all missing, that's a gimbal. If nothing from the evening survived, that's a sensor. Put the symptom table next to it and check.
If you've been shooting on a phone, you already have the material to test this on. Before you start comparing cameras, take the folder from your last trip and finish one video with it.
New accounts get free credits, no card required.
The order
| Step | What to do | Cost |
|---|---|---|
| 1 | Change how you film (short takes, connective shots) | $0 |
| 2 | Buy a microphone | $89 |
| 3 | Finish one video from footage you already have | Free credits |
| 4 | Buy the camera that step 3 pointed at | $329+ |
Swap 3 and 4 and you'll usually end up with gear you don't use.
FAQ
Can I start vlogging with only a phone?
Yes. A current phone shoots 4K and handles daylight well. Its real weaknesses are audio, walking shots, and low light — and the first is solvable for under $100.
What should I do before buying a camera?
Take footage you already have and finish one video with it. Watching which clips you discard, and why, reveals whether you need a microphone, a gimbal, or a bigger sensor. No review can answer that for you.
When is it right to move to mirrorless?
When you've finished an edit and still feel the image itself is the limitation. Shallow depth of field and color rendering can't be replicated by a phone or a gimbal camera, so if that's the reason, mirrorless is the correct answer. If the reason was connective shots or audio, a mirrorless body won't fix it.
Should I buy a microphone or a camera first?
The microphone. Audio problems can't be rescued in the edit, while image problems are partly hidden by choosing good cuts.
How much footage should I expect for a 10-minute vlog?
Under an hour if you shoot on a phone. With a gimbal camera or action cam, several hours across hundreds of short clips is normal — both are built to make filming effortless.
How is this different from CapCut or Vrew?
CapCut and Vrew help once the timeline is open, meaning after you've decided which clips to use. heimlog handles the step before that: selecting usable scenes from hundreds of files and putting them in order. Conversely, precise color grading and multi-track audio aren't possible in heimlog.
What's the hardest part of vlogging for beginners?
Reviewing footage. Filming is enjoyable and cutting is a skill you build, but watching hours of your own near-duplicate clips to find the usable ones is where people stop.
Sources
- 30–60 minutes of editing per finished minute — Tasty Edits, VeedYou
- DJI Osmo Pocket 3 gimbal and 1-inch sensor specification — Austin Gallery
- GoPro Hero 13 Black stabilization; Osmo Action 6 sensor and battery — Finding the Universe
- Insta360 X5 reframe-after-capture workflow — OBSBOT