How to Automate Video Editing Using Claude Code (Without Premiere) [AI Video Editing #2]
![How to Automate Video Editing Using Claude Code (Without Premiere) [AI Video Editing #2]](https://storage.ghost.io/c/1b/90/1b90bca5-caef-43b3-90d6-4b197d90c045/content/images/size/w960/2026/08/------------------------------------16-.png)
Hello, this is YangD!
I’ve put together a guide for our community on how to automate video editing using Claude Code.
Did you know you can automate everything from rough cuts to subtitles and motion graphics—without ever opening traditional video editing software like Premiere Pro or After Effects?
All you need to do is chat with Claude Code as if you were messaging a friend on KakaoTalk: “Edit this for me,” or “Make the graphics pop a bit more.” Once you set up 3 free open-source tools (FFmpeg, WhisperX, and HyperFrames), you just need to follow a simple 5-step guide to churn out anything from short-form clips to long-form videos in no time!
Nope! Claude Code doesn’t actually touch Premiere Pro or Final Cut Pro directly.
Instead, it sets up a "task instruction manual" and "automated tools" inside your project folder. In other words, when you place your raw footage into the folder and give spoken or written commands, Claude reads the manual, combines the right tools, and handles everything—from rough cuts to motion graphics, subtitles, and background music—on its own.
🛠️ What tools do I need before getting started?
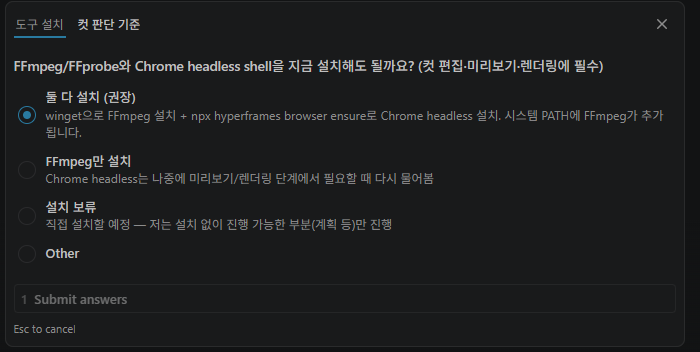
You only need 3 free open-source tools. Please install them in this order: FFmpeg → WhisperX → HyperFrames.
| Tool Name | Role | Installation Method / Notes |
| FFmpeg | Video cutting and stitching engine | • Mac: • Windows: Download the official build and add it to your PATH |
| WhisperX | Precise speech-to-text transcription | • pip install whisperx |
| HyperFrames | HTML/CSS-based motion graphics engine | • • (Requires Node.js 22 or higher) |
📌 Things to know before you start
- While the 3 open-source tools listed above are free, Claude Code itself requires a paid subscription plan. Make sure to check your subscription before setting everything up.
- If you’ve never used a terminal before, the initial setup might take a bit of time. But once it's configured, you can do all your editing purely through chat!
- The longer your raw video is, the longer the transcript becomes, which increases the token usage processed by Claude. Because this can consume your usage limit quickly, I recommend starting with a shorter video to get a feel for the workflow.
Don't worry! You can copy and paste the commands above directly into Claude Code, and it will handle the installation for you. If a required dependency is missing along the way, Claude will ask, "This tool needs to be installed, should I proceed?"—all you have to do is hit Yes!
🚀 5-Step Guide to Video Editing with Claude Code
Here is an overview of the workflow and the actual prompts you can use. Feel free to copy and paste them directly!
[Step 1] Rough Cut ➔ [Step 2] Motion Graphics ➔ [Step 3] Subtitles ➔ [Step 4] BGM ➔ [Step 5] Export
Step 1: Cutting Out Unnecessary Parts (Rough Cut)
First, create a dedicated project folder and place your raw video file inside it. Then, copy the file path and enter a prompt like the one below.
💬 Prompt:
[Paste raw video file path] Start a new project with this raw clip. Please perform a rough cut.The AI will automatically remove silent pauses, filler words like "uh" or "um," and bloopers. If you aren't satisfied with the rough cut result, you can ask Claude Code for quick adjustments right away. In my case, I simply said, "Trim the section from 35 to 40 seconds," and it cut it instantly!

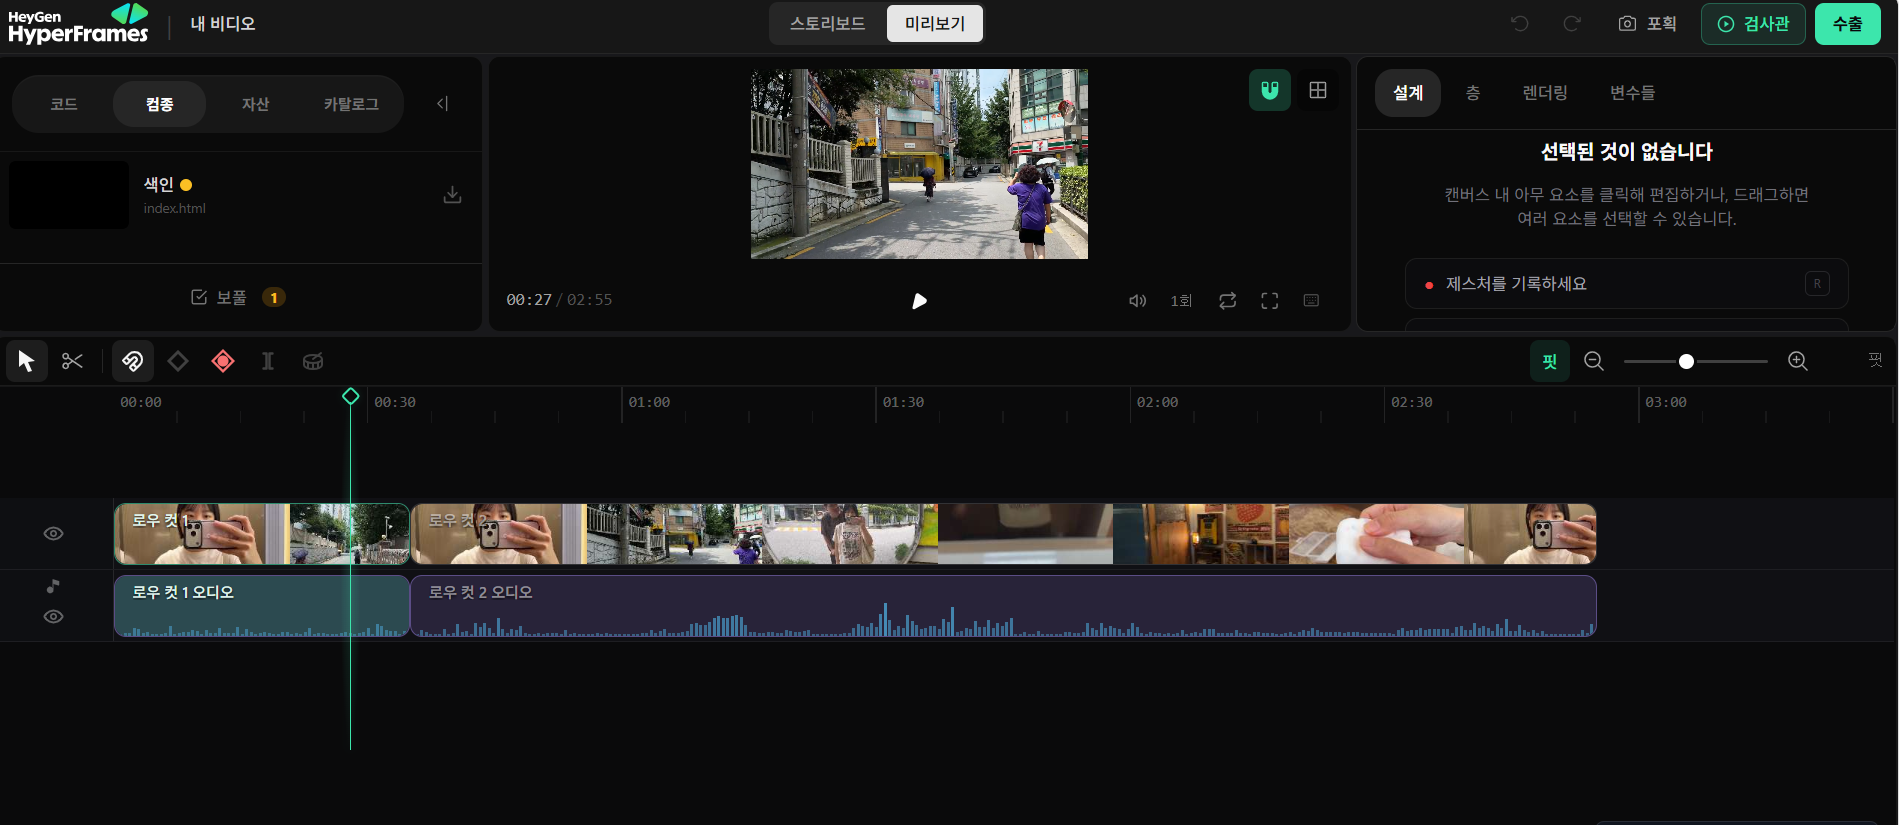
- Example revision requests:
- "This cut is too tight, leave a bit more room at the beginning."
- "There's a stray word left here that wasn't removed, please delete it."
⚠️ Caution: Do not move on to the next step until you are completely satisfied with the cuts. If the cut timing changes later on, all the graphics overlaid afterward will get out of sync!
Step 2: Generating Motion Graphics
Now it’s time to create motion graphics. When I prompted, "Please proceed with motion graphics," Claude asked me what kind of motion graphics I wanted to create. I decided to make an opening title card.
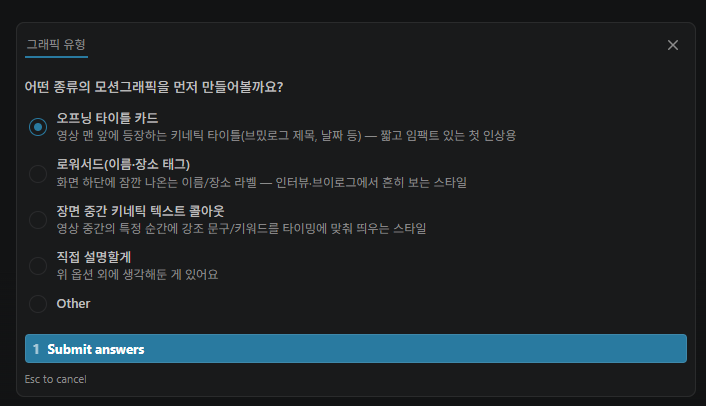
If you already have a clear style in mind, it's best to include it in your initial prompt. But if you're not sure, that’s totally fine too—you can let it generate a rough draft first and refine it later.
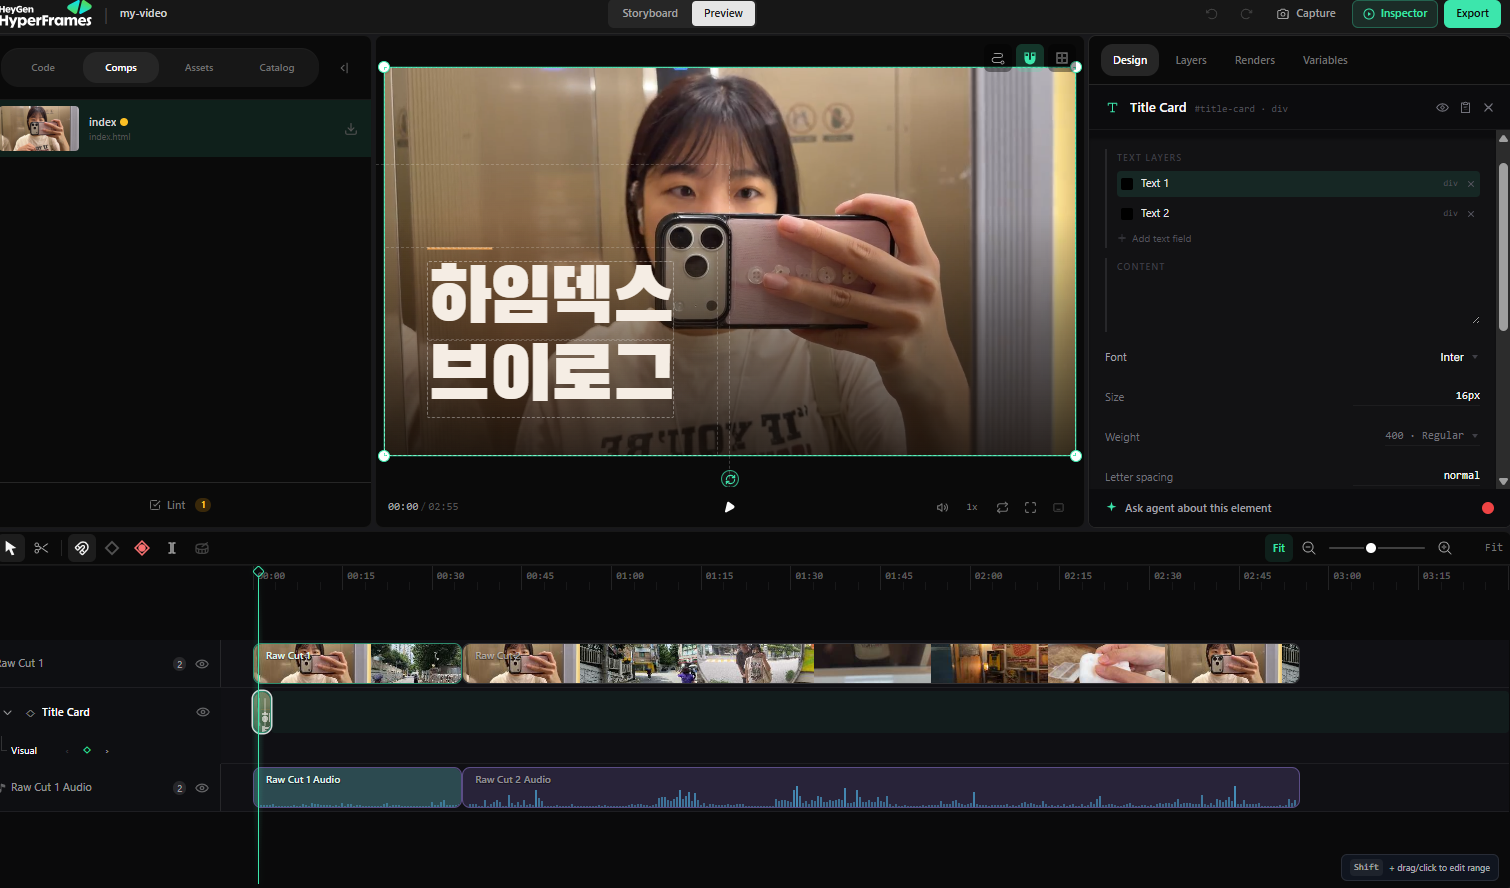
I generated the initial graphic without specifying a style, and then provided my feedback:
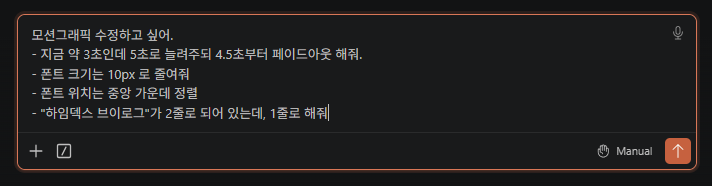
It immediately adjusted everything according to my directions. It’s amazing to see changes happen without tweaking a single setting in a traditional video editor! 🤩
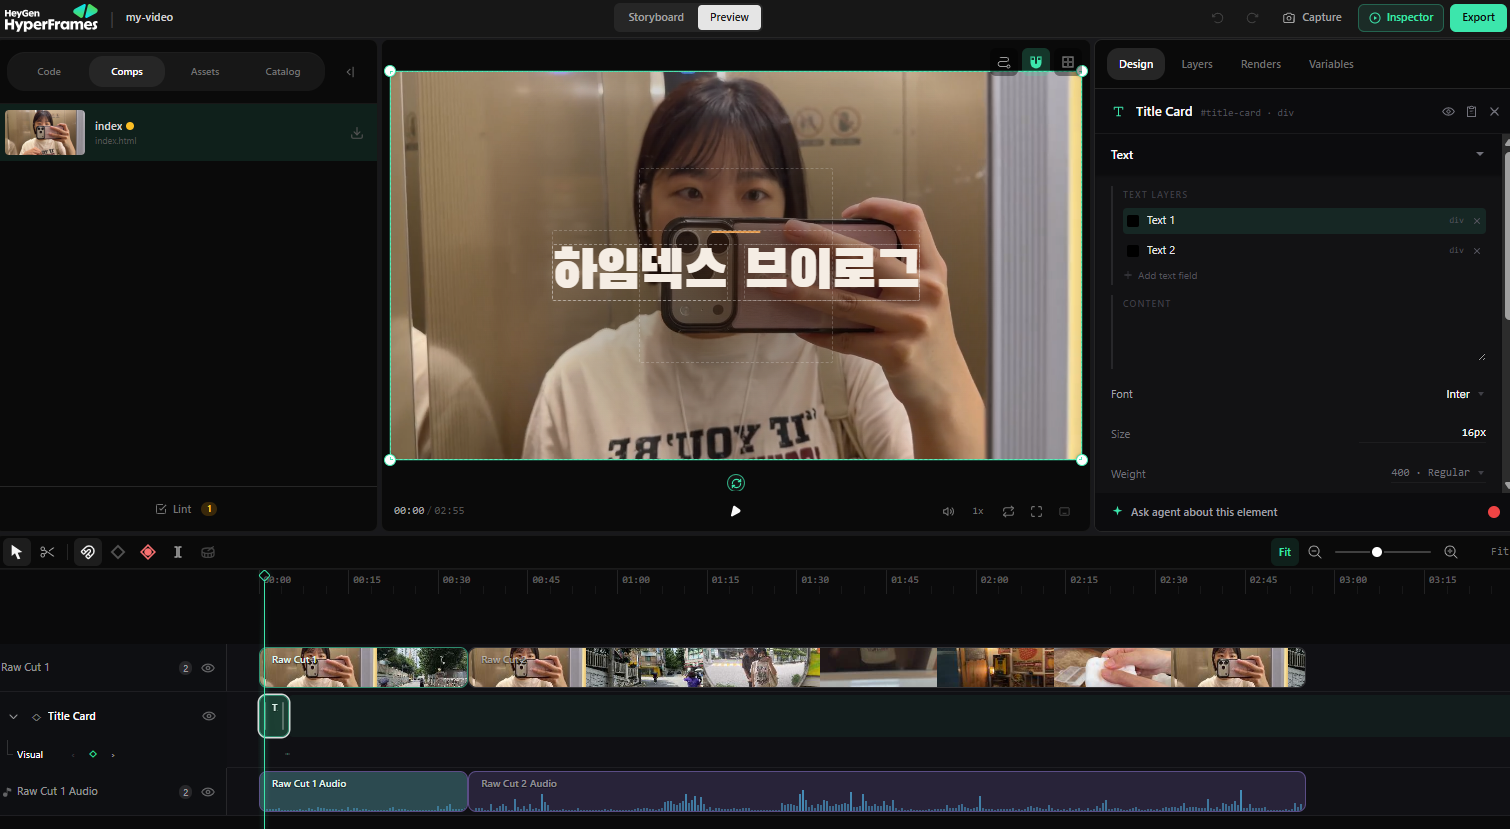
Iterating and fine-tuning the AI's initial draft is key to getting great results. Use the prompt example and guidelines below to elevate your video quality:
💬 Prompt Example:
Change the color of the first graphic to[Desired Color]. Add the[Desired Image/Logo]PNG file from the assets folder. Reduce its size slightly and move it toward the bottom of the screen. Also, add a subtle, bouncy glow animation to it.
📌 Tips for Effective Revision Prompts:
- Be Specific: Point out exact elements like "the first graphic" or "the 3rd subtitle line."
- Specify Design Changes: Clearly state colors, sizes, and positions.
- Explain the Reason: E.g., "Move it down because it's covering my face." Giving context helps the AI make smarter adjustments!
Step 3: Adding Subtitles
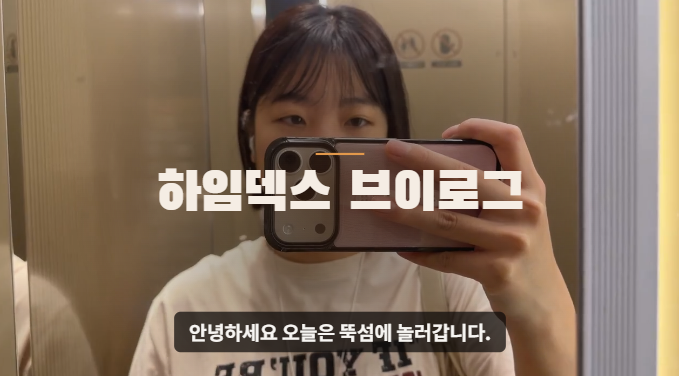
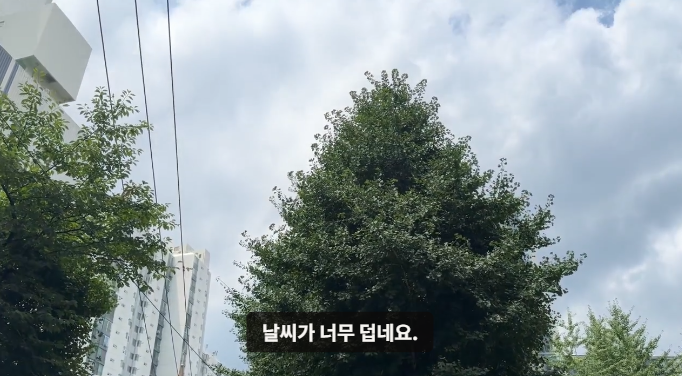
Claude Code will offer 3 ways to handle subtitles. Choose the option that best fits your workflow. If your computer has enough RAM, Option 1 is recommended. Otherwise, you can import an external caption file or type out the text manually.
- Local Transcription after Build Tool Setup: Install
cmake+ C++ compiler (like Visual Studio Build Tools), buildwhisper.cpp, and transcribe automatically using thelarge-v3model. (Setup and model downloading take time, and CPU transcription can be slow.) - Import Existing Subtitle/Script Files: If you already created an SRT, VTT, or JSON subtitle file using tools like Vrew or CapCut, you can import it directly. This is the fastest and most accurate method.
- Manual Dictation & Timing: Watch the video and provide the lines along with approximate timestamps, and Claude will convert them into subtitle clips.
I went with Option 1 to complete the subtitles. You can easily request font, size, or style changes directly from Claude Code at any time (e.g., "Change the font to [Font Name] and put a black background box behind the text.").
Step 4: Inserting Background Music (BGM)
Just give Claude the file path to your background music, and you're set!
💬 Prompt:
[Paste BGM file path] Please add this background music. Set the volume level to around -20dB so it stays subtle in the background.Step 5: Final Export (Rendering)
Once everything looks good, request the final export.
💬 Prompt:
Everything looks great, export the final video.
The finished file will automatically be saved in both your Downloads folder and your project folder. If you want to make further edits later, you can simply reopen the project file and continue tweaking it through chat!
🌟 Do I have to set this up every single time?
While you only need to install the tools once, you still have to set up project folders and write prompt instructions for every new video. Since a single shifted cut can throw off graphic timings, thorough reviewing is essential, and you may occasionally need to chain other tools together.
If you run a channel regularly, your biggest bottleneck is likely "knowing how to edit, but lacking the time and bandwidth to repeat this tedious process for every video," leading to delayed upload schedules.
That’s where Heimdex comes in. Without any complex tool setups, simply upload your raw footage—Heimdex automatically handles rough cuts, subtitles, and background music so you never have to scramble to meet upload deadlines again.
If you want to effortlessly pick your favorite takes and streamline your workflow, give Heimdex a try!
🎁 [Heimdex 'HeimLog' Pre-Registration Event]
Pre-register now to receive free vlog creation credits!
- Click the banner below to go to the pre-registration page.
- Fill out the application form.
- Get 70 credits upon beta launch!